Ziel des Projekts sollte es sein günstige IoT Sensoren zu erstellen und in FHEM einzubinden. Hierzu habe ich folgendes Szenario erstellt:
- Entwicklerboard (ESP8266)
- angeschlossener Temperatur und Luftfeuchte Sensor (DHT22)
- Connect via WLAN
- Ermittlung der Ablesezeit von einem NTP Server
- Erstellen eines JSON Strings
- Publish auf MQTT Server (Mosquitto)
- Verwenden des DeepSleep Modus beim ESP8266 um Strom zu sparen (für Batteriebetrieb)
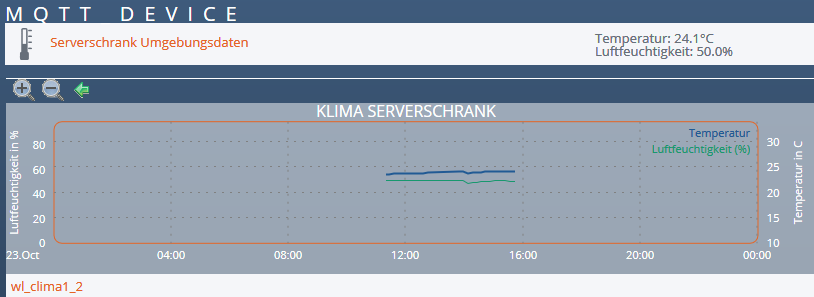
- FHEM liest die Daten vom MQTT Server und visualisiert diese.
Mosquitto einrichten
Zunächst habe ich den MQTT Server eingerichtet. Ich habe mich hier für Mosquitto entschieden. Das Ganze läuft als Docker Container.
Da die IoT Devices in einem eigenen WLAN Netz befinden, musste die Firewall auf den MQTT Server freigegeben werden.
Zusätzlich wurde eine Benutzerauthentisierung eingerichtet.
das Mosquitto aclfile.conf sieht wie folgt aus:
# this only affects clients with username admin
user admin
topic read $SYS/#
topic readwrite #

# This only affects clients with username esp8266
user esp8266
topic write /environmental_sensors/#

# this affects all clients
pattern write $SYS/broker/connection/%c/stat
Mit mosquitto_passwd kann man dann die Passwörter in die Passwortdatei speichern. Nach einem Reload des Mosquitto (kill -hup) akzeptiert der MQTT Broker die Schreibrequests der IoT Devices auf allen Topics die mit „/environmental_sensors/“ anfangen.
FHEM
Um FHEM an den MQTT anzubinden benötigt man folgende Konfigurationen:
#MQTT - https://haus-automatisierung.com/hardware/fhem/2017/02/13/fhem-tutorial-reihe-part-26-esp8266-arduino-mqtt-temperatur-an-fhem.html
define Mosquitto MQTT mqttServer:1883

# wandelt JSON Strings aus dem reading "data" im Device "mqtt01".
define Jason2Readings01 expandJSON mqtt01:data.*

# Erstellen Device "mqtt01" zum lesen aus dem MQTT Server
define mqtt01 MQTT_DEVICE
attr mqtt01 IODev Mosquitto
attr mqtt01 icon temp_temperature
attr mqtt01 room IoT
attr mqtt01 stateFormat Temperatur: temperature°C<br>Luftfeuchtigkeit: humidity%
attr mqtt01 subscribeReading_data /environmental_sensors/iotLocation

# Logging der Daten aus den readings "temperature" und "humidity"
define FileLog_mqtt01 FileLog /var/log/fhem/mqtt01-%Y-%m.log mqtt01:(temperature|humidity).*
attr FileLog_mqtt01 logtype esp8266-dht22:Plot,text

# Define GPlot zur Visualisierung
define wl_mqtt01 SVG FileLog_diningRoomServerRack:esp8266-dht22:CURRENT
attr wl_mqtt01 label "Klima IoT Device 01"
attr wl_mqtt01 room IoT
attr wl_mqtt01 title "Klima IoT Device 01
Die passende gplot Datei esp8266-dht22.gplot sieht dann so aus:
set terminal png transparent size <SIZE> crop
set output '<OUT>.png'
set xdata time
set timefmt "%Y-%m-%d_%H:%M:%S"
set xlabel " "
set ytics nomirror
set y2tics
set yrange [0:99]
set y2range [10:50]
set title '<L1>'
set grid xtics y2tics

set y2label "Temperatur in C"
set ylabel "Luftfeuchtigkeit in %"

#FileLog 4:temperature:0:
#FileLog 4:humidity:0:

plot \
  "< awk '/temperature/{print $1, $4}' <IN>"\
     using 1:2 axes x1y2 title 'Temperatur' with lines lw 2,\
  "< awk '/humidity/ {print $1, $4+0}' <IN>"\
     using 1:2 axes x1y1 title 'Luftfeuchtigkeit' with lines\
ESP8266
Nun zur eigentlichen Entwicklung des ESP8266. Ich verwende aktuell die Arduino IDE für das Flashen. Hier sind ein paar zusätzliche Bibliotheken zu installieren:
- Das ESP8266 package via Boardverwalter-URL: http://arduino.esp8266.com/stable/package_esp8266com_index.json
- PubSubClient (Version 2.6.0) – MQTT Bibliothek
- NTPClient (Version 3.1.0) – für die Zeitsynchronisation
- ArduinoJson (Version 5.13.3) – für das Erstellen des JSON Strings
- DHT sensor library by Adafruit (Version 1.0.0) – für das Auslesen der Sensordaten
Da ich mit dem DeepSleep Modus des ESP8266 arbeite, ist der Quellcode nur in der standard Funktion „void setup()“ enthalten. Die Funktion „void loop()“ bleibt in dem Fall leer.
Der Kopfbereich des Programms sieht dann so aus:
/* ESP8266 + WiFi connection, DHT22 Humidity and Temperature Node reading
 * and send to MQTT Broker
 */

#include <PubSubClient.h> // @see: "https://pubsubclient.knolleary.net/api.html"
#include <ESP8266WiFi.h>  // @see: "https://arduino-esp8266.readthedocs.io/en/latest/esp8266wifi/readme.html"
#include <DHT.h>
#include <ArduinoJson.h>  // @see: "https://arduinojson.org/"
#include <NTPClient.h>    // @see: "https://diyprojects.io/esp8266-web-server-part-3-recover-time-time-server-ntp/#.W876FvZCSUk"
#include <WiFiUdp.h>
#include <ctime>          // to parse epoch into ISO 8601 Zulu Time String

// initialize the clients
WiFiClient espClient;
PubSubClient client(espClient);
#define DHTTYPE DHT22 // DHT11 or DHT22
#define DHTPIN  2
DHT dht(DHTPIN, DHTTYPE, 11);
WiFiUDP ntpUDP;
NTPClient timeClient(ntpUDP, "ntpServerName", 0, 60000); //

// The MQTT server connection parameters
const char* mqtt_server = "mqttServerName";
const int mqtt_port = 1883;
const char mqttUser[] = "esp8266"; // MQTT broker user
const char mqttPass[] = "myIoTPasswordForMQTT"; // MQTT broker password
String clientName = ""; // MQTT client name
// The MQTT topics to publish messages to
String topicPrefix = "/environmental_sensors/";
String topicLocation = "iotLocation";
String topic = topicPrefix + topicLocation;

// DeepSleep time in us
long deepSleepTime = 6e8; // 60e6 is 60 Seconds 9e8 is 15 Minutes
Danach folgen ein paar Helfer Funktionen.
/**
 * macToStr - converts a MAC address to a String
 * @param mac: uint8_t* MAC address
 * @return: String the MAC address as String
 */
String macToStr(const uint8_t* mac)
  {
  String result;
  for (int i = 0; i < 6; ++i)
    {
    result += String(mac[i], 16);
    if (i < 5)
      result += ':';
    }
  return result;
  }

/**
 * floatToStr - converts a float to a String
 * @param f: float, the float to convert
 * @param p: int, the precission (number of decimals)
 * @return: String, a string representation of the float
 */
char *floatToStr(float f, int p)
  {
  char * pBuff;                         // use to remember which part of the buffer to use for dtostrf
  const int iSize = 10;                 // number of buffers, one for each float before wrapping around
  static char sBuff[iSize][20];         // space for 20 characters including NULL terminator for each float
  static int iCount = 0;                // keep a tab of next place in sBuff to use
  pBuff = sBuff[iCount];                // use this buffer
  if (iCount >= iSize - 1)              // check for wrap
    {
    iCount = 0;                         // if wrapping start again and reset
    }
  else
    {
    iCount++;                           // advance the counter
    }
  return dtostrf(f, 0, p, pBuff);       // call the library function
  }
Danach kommen die Funktionen für den Verbindungsaufbau und die Datenverarbeitung.
WLAN Verbindungsaufbau:
/**
 * setup_wifi - connects to a WiFi network
 * and log the IP address and MAC of the Device
 */
void setup_wifi()
  {
  const char* ssid = "iot-wlan";
  const char* password = "iotWLANpassword";
  const String clientNamePrefix = "esp8266-";

  delay(10);
  // We start by connecting to a WiFi network
  Serial.println();
  Serial.print("Connecting to ");
  Serial.println(ssid);

  // WiFi only as client
  WiFi.mode(WIFI_STA);
  // Authenticate to WiFi network
  WiFi.begin(ssid, password);

  while (WiFi.status() != WL_CONNECTED)
    {
    delay(500);
    Serial.print(".");
    }

  Serial.println("");
  Serial.println("WiFi connected");

  // get the MAC address of the device
  uint8_t mac[6];
  WiFi.macAddress(mac);

  // log MAC address and IP address
  Serial.print("MAC address: ");
  Serial.println(macToStr(mac));
  Serial.print("IP address: ");
  Serial.println(WiFi.localIP());

  // append MAC Address to clientName to connect to MQTT
  clientName = clientNamePrefix;
  clientName += macToStr(mac);
  }
MQTT Verbindungsaufbau
/**
 * setup_mqtt - connects to MQTT broker and subscribe to the topic
 */
void setup_mqtt(String clientName)
  {
  client.setServer(mqtt_server, mqtt_port);
  Serial.print("Connect to MQTT Broker ");
  Serial.println(mqtt_server);
  if (!client.connect((char*) clientName.c_str(), mqttUser, mqttPass))
    {
    Serial.print("failed, RC=");
    Serial.println(client.state());
    }

  // Loop until we're reconnected
  Serial.print(".");
  while (!client.connected())
    {
    delay(500);
    Serial.print(".");
    }

  Serial.println("");
  Serial.println("MQTT connected");

  // process incoming MQTT messages and maintain MQTT server connection
  client.loop();
  }
Ermitteln des Aktuellen Datums und Uhrzeit per NTP
/**
 * read_ntp - connects to ntp server, make an update and return epoch
 * @return: unsigned long, time in seconds since Jan. 1, 1970 (unix time)
 */
unsigned long read_ntp()
  {
  // Start NTP client
  Serial.println("Start NTP Client.");
  timeClient.begin();

  // get time
  Serial.println("Get NTP datetime");
  timeClient.update();
  unsigned long epoch = timeClient.getEpochTime();

  // Stop NTP client
  Serial.println("Stop NTP Client.");
  timeClient.end();

  return(epoch);
  }
Auslesen des DHT22 Sensors
/**
 * read_dht - read the DHT22 sensor values and return results
 * @return: String, the mqtt payload of the readings
 */
String read_dht()
  {
  String payload;
  float t, h;

  Serial.println("Try to read from DHT sensor!");
  h = dht.readHumidity();
  t = dht.readTemperature();
  // Check if any reads failed and exit early (to try again).
  while (isnan(h) || isnan(t))
    {
    Serial.println("Failed to read from DHT sensor!");
    Serial.println("Try again in 5 seconds");
    // Wait 5 seconds before retrying
    delay(5000);
    h = dht.readHumidity();
    t = dht.readTemperature();
    }

  Serial.println("DHT Sensor readings:");
  Serial.print(t);
  Serial.println("°C");
  Serial.print(h);
  Serial.println("%");

  // adjust readings
  //h = h * 1.23;
  //t = t * 1.1;

  // convert float to String with precission of 1
  String tPayload = floatToStr(t, 1);
  String hPayload = floatToStr(h, 1);

  // get NTP Time
  unsigned long epoch = read_ntp();
  Serial.print("Zeit von NTP: ");
  Serial.println(epoch);
  // convert to datetime String
  char timestamp[64] = {0};
  const time_t epochTime = epoch;
  strftime(timestamp, sizeof(timestamp), "%Y-%m-%dT%H:%M:%SZ", localtime(&epochTime));
  Serial.println(timestamp);

  // create a JSON object
  StaticJsonBuffer<200> jsonBuffer; // Buffer calculation see "https://arduinojson.org/v5/assistant/"
  JsonObject& root = jsonBuffer.createObject();
  root["datetime"] = timestamp;
  root["location"] = topicLocation;
  root["temperature"] = tPayload;
  root["humidity"] = hPayload;
  // generate json string for MQTT publishing
  root.printTo(payload);
  Serial.println(payload);

  return(payload);
  }
Die Funktion void setup()
/**
 * setup - the main function after booting the microcontroller
 */
void setup()
  {
  // initialize serial console with 115200 bauts
  Serial.begin(115200);
  Serial.setTimeout(2000);
  // Wait for serial to initialize.
  while(!Serial) { }

  // connect to WiFi network
  setup_wifi();

  // connect to MQTT Broker
  setup_mqtt(clientName);

  // read DHT22 temperature and humidity
  String payload = read_dht();
  Serial.println("MQTT message payload to send to topic.");
  Serial.print("Payload: ");
  Serial.println(payload);

  // send payload to topic
  bool topicRetained = true;
  if (client.publish((char*) topic.c_str(), (char*) payload.c_str(), topicRetained))
    {
    Serial.print("published environmental data to topic ");
    Serial.println(topic);
    }
  else
    {
    Serial.print("FAILED to publish environmental data to topic ");
    Serial.println(topic);
    Serial.print("MQTT state: RC=");
    Serial.println(client.state());
    }

  // Wait 20 seconds before proceeding
  Serial.println("Waiting for 5 seconds");
  for (int i = 0; i < 5; ++i)
    {
    Serial.print(".");
    client.loop(); // process incoming MQTT messages and maintain MQTT server connection
    delay(1000); // 1 Second
    }
  Serial.println();

  // disconnecting from MQTT broker
  Serial.println("Disconnecting from MQTT Broker.");
  client.disconnect();

  // Wait 20 seconds before proceeding
  Serial.println("Waiting for 5 seconds");
  for (int i = 0; i < 5; ++i)
    {
    Serial.print(".");
    client.loop(); // process incoming MQTT messages and maintain MQTT server connection
    delay(1000); // 1 Second
    }
  Serial.println();

  // close WiFi connection
  Serial.println("Closing WiFi connection");
  espClient.stop();

  // going into deep sleep
  Serial.println("Going into deep sleep.");
  ESP.deepSleep(deepSleepTime);
  }


/**
 * loop - the ESP loop while the microcontroller is running
 */
void loop()
  {
  }
Ergebnis
Nachdem alles sauber aufgesetzt ist purzeln dann munter im MQTT Topic die Nachrichten rein:

Und werden im FHEM dargestellt:

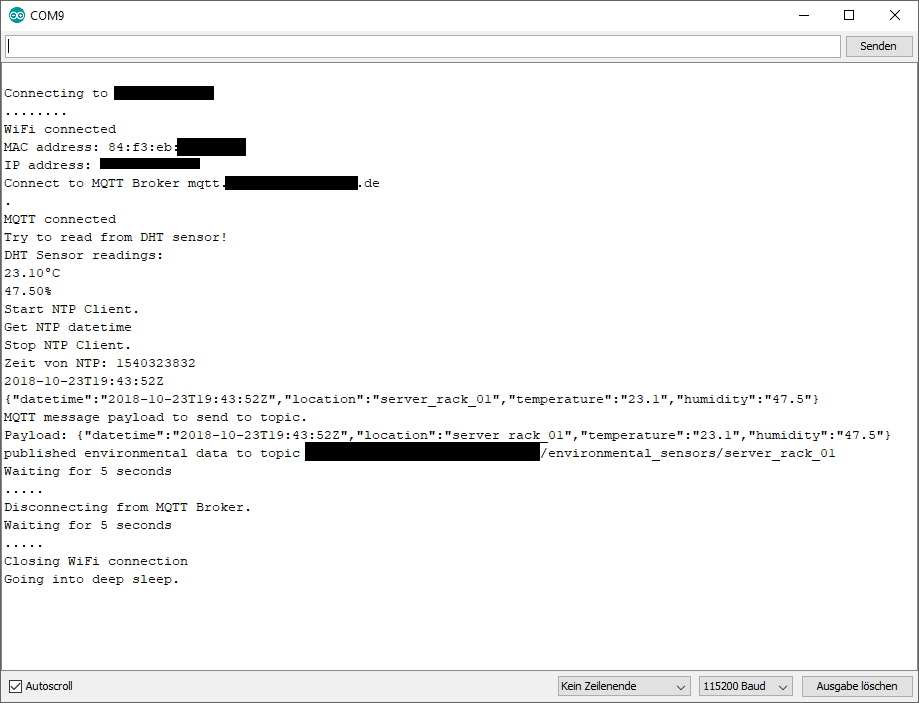
Die Ausgabe an der seriellen Console der Arduino IDE sieht so aus:

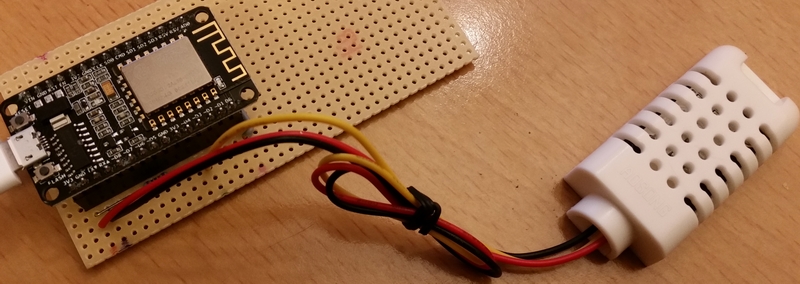
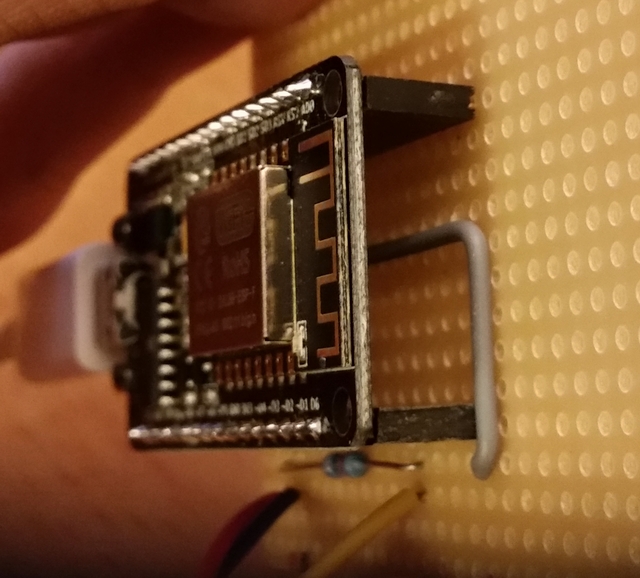
Und so sieht das Board aus (noch nicht zugeschnitten und das passende Gehäuse fehlt auch noch):


